Sunday, November 16, 2008

Simple silhouette setup
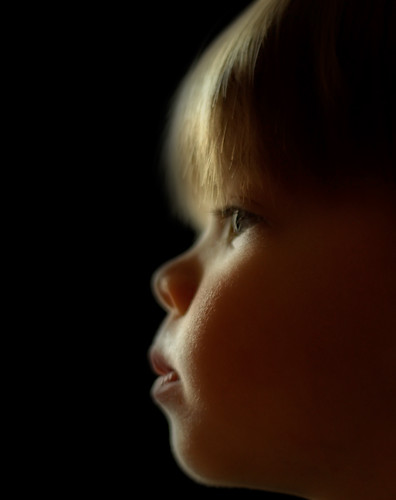
Here's a simple setup that will yield some impressive silhouette portraits. All you need is a window, a sheet of black foam board (available for a couple of dollars at a craft or office store), a subject and your camera.


Place the black foam board next to a window in your home - you don't need direct sunlight; in fact a north window works very well for this. Place your subject a 3-4 feet in front of the board, then frame the subject against the backdrop.

You'll probably need to drop your exposure value down one or two stops to keep the camera from overexposing the picture (the black background will make it want to give it more light than it needs). Once you get the setting, you're in business. Focus on the subject's eye and have fun!

Labels: ,

Sunday, March 4, 2007

What light through yonder window shines

Here’s a quick setup for taking some very impressive photos indoors. I set up a table near a window (make sure it’s not getting direct sunlight) and create a background of colored paper purchased from a craft/hobby store. I then use a piece of white poster board or foam board to reflect some light into the shadow side of the subject. The top photo shows the setup with an antique camera given to me by my wife’s father. The lower photo shows the finished image taken with a digital point-and-shoot camera (a Kodak Easy Share C633).

The result is soft light in a low-key ratio that even the point-and-shoot’s autoexposure catches well.

Hints for using this setup with a digital point-and-shoot: Use a tripod. Depending on the brightness of the day, the exposures will be fairly long. A tripod will make sure the camera is held steady throughout the exposure. Use the self timer. I set the timer for ten seconds. This gave me enough time to press the shutter button, then position the posterboard reflector before the shutter opened. I found I got sharper results when using the center-weighted autofocus function. I also set the ISO to 80, but you should play around and note the results that changes of ISO settings create.

This setup also works well for portraits consisting of one or two people. For a head-and-shoulders shot, seat the subject(s) near the window and prop the poster board (or have an assistant hold the board) to cast reflected light into the shadow side of the face(s).

And did I mention you should use a tripod?

Click on pictures to enlarge. Photographs © 2007 James Jordan.

Labels:

Monday, January 1, 2007

Searching for Mr. Good Light

Early morning and late afternoon offer the best light of the day. The sun is low in the sky, harsh shadows are minimized and the light is warmer. Try to avoid taking pictures outdoors at midday, when the light is harsher, cooler and casts nearly vertical shadows.

Overcast days provide soft, even light that allow you to capture a full range of detail in your photos. Overcast skies can be quite dull, so try to minimize the amount of sky in your photos on these days.

In the absence of advanced lighting equipment, pleasing portraits can be made outdoors on overcast days. Moving the subject into a shaded area on a sunny day also works well. Be careful, however, to minimize bright sunny areas in the background behind your subject.

Photographs © 2007 James Jordan. Click on pictures to enlarge.

Labels: ,