Tuesday, April 14, 2009

A few minutes with ...
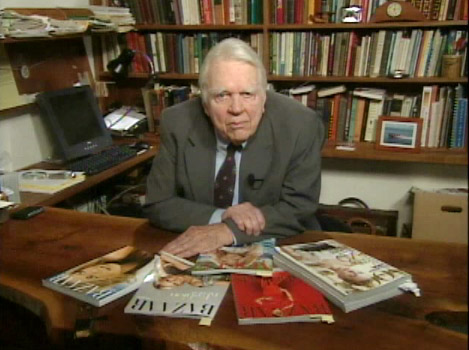
I’m going to go all Andy Rooney on you here for a minute and talk about something that bugs me regarding the photo advice I see on the interwebs. People who really should know better use the phrase, “Practice, practice, practice.” I find the phrase wrong, wrong, wrong.

Why? Because the phrase doesn’t tell you what or how to practice. If all you know is how to take pictures that are poorly composed, badly exposed (and that should be disposed), then practicing only cements your bad habits into place, and compounds your frustration. Been there, done that.

Try this instead. Work on just one thing at a time, then practice the heck out of it. For instance, early on in my photography I made up my mind that I was going to master exposure. But not just any exposure, I wanted to own exposure of early morning landscape shots. So I got up early. A lot. I went out and took photos of sunrises and the stuff the sunrise shone on until I could get a good exposure with good details in the highlights and shadows nearly every time (this was in the days of film, so it was a long process. Digital photography allows instant feedback so you can adjust in real time, not days and weeks, as I had to endure).

Then I moved to late afternoon/evening shots and practiced the heck out of those. Then nighttime shots. Then indoor shots. Get the idea? Get good at one thing, then add to it as you go. It makes practice meaningful and you see incremental progress faster.

Want a place to start practicing? Then either click on Basics, Composition or Exposure in the blog tags below to see all posts on Ready, Aim, Click that pertain to those subjects.

Then get practicing.

Labels: , ,

Monday, April 13, 2009

Photographing water on the move

Take your shots of creeks, waterfalls and surf to a higher level by slowing down your exposure time. Digicamhelp, a web site for digital photography beginners (and beyond) is featuring an article I wrote that gives tips on how to get that misty, dreamy quality in your water shots. Check it out.

Labels: ,

Thursday, April 19, 2007

Basic post-processing

A camera’s exposure system is designed to calculate all of the light levels coming into the camera and set an exposure that averages all the light to match a neutral gray tone. The result of all that averaging is usually a photo that looks, well – average. And we all know the people and pets in your life are anything but average.

The photo above, on the left, is what a Kodak Easyshare C633 presented of my adopted stray cat, Poly. (You can find out how she came upon her name with one “L” here). The photo is kind of gray and murky. Average.

A little work in a photo editing program (in this case, PhotoShop) brings the photo back to life and gets closer to what my eyes saw as I pressed the shutter button. I started by increasing the overall contrast. In PhotoShop this is accomplished in the Adjust/Levels dialog box by sliding the left and right sliders toward the center, then sliding the midtones to the left, brightening the photo. A similar effect can be achieved by increasing the contrast and brightness settings if your photo editing program is a simple one.

I then increased the color saturation, then selected everything except the cat’s face (in PhotoShop, I used the elliptical selector, lasso’d the face, then inverted the selection). I feathered the edges of the selection, decreased the levels of the background, then applied a blur. The resulting effect (photo on the right) really brought out the cat’s eyes, which I wanted to be the focal point of the picture. In fact, when taking photos of people or animals, focus on the eyes.

I then used the clone tool to make some adjustments to the catch lights in her eyes (raised and moved out of the irises), and I was finished.

Using a photo editing program after you’ve created a picture is not cheating. It’s unlocking the information that’s inherent in your photo, but has just been rendered as “average.”

Photos © 2007 James Jordan.

Labels: ,

Wednesday, April 4, 2007

Shoot the moon

Earth’s companion in the night sky has inspired dreamers and poets since time immemorial. It also makes for great photos. Here are a few tips for shooting the moon.

The correct exposure for the moon high in the sky follows the “Sunny 16” rule – Shoot at f16 and use a shutter speed closest to the inverse of the ISO of your film or camera setting. If using 100 ISO, then your shutter speed should be as close as possible to 1/100 of a second – in most cases, 1/125. Follow the same scenario for 200 ISO, 400 ISO, etc.

When the moon is visible during daylight hours, Sunny 16 works like a charm. Both the moon and earthly foreground objects will be in harmony as far as exposure is concerned. It gets trickier when shooting in twilight or darkness and you wish to also capture some foreground detail. Properly exposing the foreground will blow out the moon. Conversely, properly exposing the moon will make your foreground too dark.

Some options:

A. Pick a foreground object that offers an interesting silhouette and forget about capturing details (top image). Use the Sunny 16 rule to determine your exposure, then bracket one stop up and down for safety. Try to shoot within a half hour or forty five minutes after sunset when the sky is a deep indigo color.

B. Concentrate on the foreground and forget about details in the moon (second image). This exposure was 180 seconds at f5.6. It blew out the moon, but given the interest in the rest of the photo, is not that a big deal.

C. Shoot the full moon as soon as it comes up as possible. It will not yet have reached full light power and you can get away with a longer exposure. You have about 10 to 15 minutes after the moon appears above the horizon before it becomes too bright to capture this way. Use a graduated neutral density filter to darken the moon and sky while keeping the foreground light enough to register (third image). A two-stop grad ND filter kept the detail in the moon while allowing for a long enough exposure (about 20 seconds) to catch the motion of waves among the rotted pilings. Keep in mind that the moon is a moving object. Too long of an exposure (more than 30 seconds) will render it as an elongated object, not round.

D. Make a blended image using two or more exposures and combine them in Photoshop. The lighthouse photo (fourth image) was comprised of three exposures – one for the moon (using Sunny 16), one for the lighthouse tower (20 seconds) and one for the light in the lantern room (5 seconds). Sometimes there is just no other way to capture an image.

Of course, you need a sturdy tripod, camera with a bulb exposure setting and a locking cable release.

Take the Nike approach to shooting moon photos – just do it. Note the results, then make adjustments and learn as you go. Have fun!

Click on photos to enlarge. Photographs © 2007 James Jordan.

Labels: ,

Sunday, January 21, 2007

Shooting into the sun

After I had reviewed one of Roger’s photos and fixed it in a prior post here, he mentioned that he imagined that it would be possible to get some interesting photos by shooting into the sun and not sticking to the maxim of shooting with the sun over one’s shoulder all the time.

The answer is a qualified yes. You can get some very interesting photos while shooting into the sun, but you have to keep several things in mind when you do so:

Shooting into the sun will mess up your automatic exposure big time, and you must compensate. Don’t shoot into the sun unless you have an extremely interesting shape to silhouette against the sky. If you want any detail at all in the object against the sun, you either need a flash or a special filter.

Compensating your exposure When the sun is going to be a major part of one of my photos, I’ll take a meter reading of the sky above the sun with the sun just out of the frame. This generally gives an accurate portrayal of the sky and will create a solid silhouette of whatever else is in the frame. The exception is when shooting flowers and foliage, which are translucent and glow beautifully when backlit. (Top photo) Any time you are using the sun to backlight a photo, whether it's in the photo or not, an exposure value (EV) of +2 is called for.

Interesting silhouette If you're going for a silhouette, it has to be very recognizable and interesting. It needs to be just as obvious to the viewer of your photo as it was to you. Keep it as simple as possible. (Second photo) Try positioning your subject directly over the orb of the sun for interesting effects (Top and bottom photos).

Want detail? If you’re close enough to the silhouetted object to use your flash, do so. But remember, too much flash will give your photo a “faked” look and too little flash will leave your subject in the dark. Improve your odds by using the portrait setting of your digital camera if it has one. Bracket your shots (shoot a picture each at one f-stop above and below your metered setting) if you are using a manual flash. (Third photo) You can also use a sheet of white poster board or foam board to reflect light back onto the subject.

If your subject is too far for flash, another option is the use of a graduated neutral density filter, if your camera is able to accept filters. A grad ND filter is dark on about a third of the filter’s surface and gradually fades to clear at about the halfway point. Positioning the dark side of the filter over the sky allows you to open your f-stop by up to four stops (depending on the strength of the filter) to give more exposure to objects on the ground. (Second and bottom photos were shot using graduated neutral density filters)

Most of all, experiment and have fun.

Click on pictures to enlarge. Photographs © 2007 James Jordan.

Labels: ,

Saturday, January 13, 2007

Troubleshooting: Underexposed portrait


Turning teenager
Originally uploaded by Phil Widewood.
There are a number of groups on Flickr where beginning photographers post their pictures for others to critique and offer advice. Some of them ask others to “fix” their pictures for them in a computer photo editing program. Ready, Aim, Click will feature some of those photographs from time to time to pass along some tips to help you make better pictures.

This is a candid photo of a gentleman’s 13-year-old daughter. She’s making the transition from childhood to adulthood and anyone who has raised teenagers knows *that* look. This photo is quite nicely done; the framing is good, as is the focus. It successfully captures a spontaneous moment in the life of a young adolescent. The photographer did well in using a zoom setting. Facial features are portrayed better with moderate zooms than with wide-angle or extreme zoom (professional portrait photographers use a moderate telephoto lens).

There is a problem with the exposure, however. The bright background behind the girl tricked the camera into thinking the subject was brighter than it really was and rendered the photo too dark overall. The photographer should have used an exposure value (EV) of +1 to compensate. The girl’s creamy complexion and gorgeous green eyes are lost. The second photo shows the portrait with the exposure corrected in PhotoShop. There are the eyes!

The third photo shows a tighter crop on the face and a softer focus on the girl’s ear. For some reason, having it in sharp focus was a distraction from the main part of the picture – her eyes.

Do you have a photo that you'd like critiqued? Fixed? Send an email to jjrdns6[at]aol.com and write "Troubleshooting" in the subject line.

Top photo: Turning Thirteen posted by Phil Widewood on Flickr. Click on pictures to enlarge. Ready, Aim, Click © 2007 James Jordan.

Labels: , ,

Monday, January 1, 2007

Searching for Mr. Good Light

Early morning and late afternoon offer the best light of the day. The sun is low in the sky, harsh shadows are minimized and the light is warmer. Try to avoid taking pictures outdoors at midday, when the light is harsher, cooler and casts nearly vertical shadows.

Overcast days provide soft, even light that allow you to capture a full range of detail in your photos. Overcast skies can be quite dull, so try to minimize the amount of sky in your photos on these days.

In the absence of advanced lighting equipment, pleasing portraits can be made outdoors on overcast days. Moving the subject into a shaded area on a sunny day also works well. Be careful, however, to minimize bright sunny areas in the background behind your subject.

Photographs © 2007 James Jordan. Click on pictures to enlarge.

Labels: ,