Monday, March 15, 2010

How do you photograph?
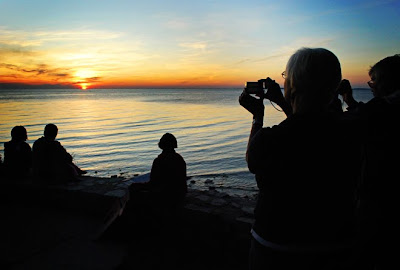
It's not what you photograph that sets you apart from other people with cameras, it's how you photograph it. What are you doing to make your pictures uniquely your own? What could a total stranger learn about you merely by looking at the pictures you take? Is it worth knowing?

The toughest lesson I learned about photography had nothing to do with ISOs, shutter speeds or apertures. It was about the reason I took pictures in the first place and what I was trying to say to the world through my photography.

There's an interesting scene in "Walk the Line," a biopic about the career of country songwriter/singer Johnny Cash. In the scene, Johnny and his band are auditioning for Sam Philips, the head of Sun Records in Memphis. Sam is ready to dismiss the ragtag group, explaining that if you only had one song to sing to the world before you die, would it be something that everyone had heard already, or would it be something that would attempt to help others see things differently than they had before hearing it? Johnny then abandons the old gospel standby and pulls out a little tune he wrote while serving in the U.S. Air Force -- Folsom Prison Blues.

If you only had a chance to make one picture before you pass on, what would you do? How would you do it differently than any picture you've made before? To what lengths would you go to make it?

Now do it.


Photograph © 2010 James Jordan.

Labels:

Wednesday, September 16, 2009

Eye in the sky

So you thought it was cool to shoot pics of yourself and/or your crush at arm's lenghth? Pish. 'Tain't nothin' compared to what you can do with a camera on a stick.

Just use a tripod or better yet, a monopod (they're lighter), extend it to full length and hoist it into the air. There are even instruction on how to convert a paint roller extender into a camera hoist that can reach upwards of 30 feet.

Tips: Use a wide angle lens, preset the focus and use the self-timer.


You'll get a unique view of your surroundings. You can even make pictures from the "squirrel cam."

Concert crowd got you down because they're blocking your view? Rise above them. High fence between you and your sunbathing neighbor? Um, never mind.

Labels:

Monday, August 24, 2009

At the zoo

A zoo is not the ideal place for animal photography. Of course, given the cost of a safari to Africa, they're the next best alternative for me.

Most zoos are designed for the living space of the creatures (at least the newer or recently refurbished ones are). The best ones integrate an "up close and personal" viewing experience. But even those don't seem to take into account the needs of photography. Glass with all manner of glare and reflections, wire mesh barriers, and living areas that, while they provide lots of room for the inhabitants, also increase the distance from the camera, making life challenging for a photographer.Here are some tips on how I do things at the zoo.

Zoom, baby. At a minimum, I have a 200mm lens on at all times. I also use a 2x teleconverter to double the zoom. The tradeoff -- an exposure that's slow as molasses. The teleconverter takes away a stop of light from an already sluggish lens. This lion was shot at ISO 800 at an exposure of 1/1250 at a "wide open" effective f-stop of f8. This was OK for animals in the early morning sunlight. Animals in the shadows, not so much. The benefits -- you can get some great "in your face" shots that help disguise the fact that you were shooting in an artificial environment. You also can shoot right through mesh barriers without them registering in your shot. This lion was shot through a series of thin vertical wires separating people from big cats at a viewing station. Just be sure you're shooting through an area of mesh that is not in direct sunlight. You also have a better chance of avoiding reflections when shooting through glass when you use a long lens.

Patience is a virtue. Zoo animals have all the time in the world. You necessarily don't. But spend some time watching the critters. You might pick up a pattern of movement that you can use to your advantage. I watched a pair of lions pacing and positioned myself to catch them as they made their turns. I caught the young male above as he turned his head in advance of his body, making him apear as if he might be roaring or at least belting out his favorite song.

I also observe the rule of shooting early or late in the day. If I have to be there in the middle of the day, I'll try to catch animals in shady areas to avoid harsh shadows and the bluish light of the midday sun. I'll also change my white balance to "flash" or "cloudy" to warm up the tones in my shots.

Got your own zoo tips? Successes? Failures? Let me know.

Labels: ,

Wednesday, July 1, 2009

Crash! Bang! Boom! 8 Tips for better fireworks photography

The Fourth of July means fireworks here in the U.S. Fireworks means a chance to pack up the family for some visual and audio stimulation. Fireworks also provides an opportunity to capture some truly stunning photographs.

Here are a few tips to elicit “oohs and ahhs” long after the fireworks display is over:

1. Set your camera’s zoom to the widest setting to ensure you capture plenty of colorful bursts. You can always crop your pictures later.

2. If you can, set your focus manually to infinity. On many cameras, the autofocus mechanism will not work properly in the dark, or will work too slowly to capture a fast-moving fireworks display.

3. Fireworks happen in the dark (duh), so you’ll need long exposures to capture the action. Use a tripod to avoid blurred pictures. A small flashlight can help you see to maneuver through your camera’s settings in the dark.

4. If your digital camera has a Fireworks mode, it will take care of the settings for you.

5. If you’re shooting film or don’t have a Fireworks mode, try this – manually set your camera to ISO 200, aperture f/8 and choose a shutter speed of about 4 seconds for starters. In the middle of the fireworks display, this setting will capture two or three bursts. Longer exposures will capture more bursts. A second or two is all you’ll need to catch the action during the finale, when the explosions come fast and furious.

6. As the display begins, adjust your tripod to aim the camera to where most of the action is occurring in the sky. You’ll most likely have to make adjustments throughout the show, so be familiar with your tripod’s controls.

7. Try to include some of the surrounding scenery in your photo. The fireworks will beautifully light up the park, stadium, lakeshore or whatever spot from which you are viewing the display.

8. Shoot often! A hundred shots may yield only a handful of keepers. But those spectacular shots will be picture perfect for sharing with friends and family.

Photographs © 2009 James Jordan.

Labels: ,

Tuesday, April 14, 2009

A few minutes with ...

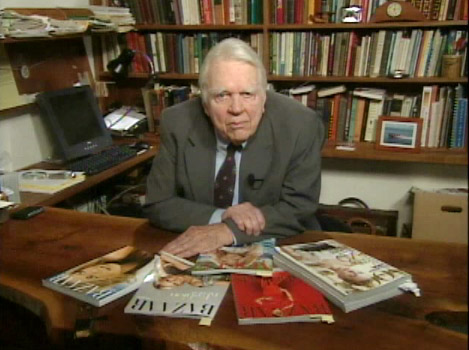
I’m going to go all Andy Rooney on you here for a minute and talk about something that bugs me regarding the photo advice I see on the interwebs. People who really should know better use the phrase, “Practice, practice, practice.” I find the phrase wrong, wrong, wrong.

Why? Because the phrase doesn’t tell you what or how to practice. If all you know is how to take pictures that are poorly composed, badly exposed (and that should be disposed), then practicing only cements your bad habits into place, and compounds your frustration. Been there, done that.

Try this instead. Work on just one thing at a time, then practice the heck out of it. For instance, early on in my photography I made up my mind that I was going to master exposure. But not just any exposure, I wanted to own exposure of early morning landscape shots. So I got up early. A lot. I went out and took photos of sunrises and the stuff the sunrise shone on until I could get a good exposure with good details in the highlights and shadows nearly every time (this was in the days of film, so it was a long process. Digital photography allows instant feedback so you can adjust in real time, not days and weeks, as I had to endure).

Then I moved to late afternoon/evening shots and practiced the heck out of those. Then nighttime shots. Then indoor shots. Get the idea? Get good at one thing, then add to it as you go. It makes practice meaningful and you see incremental progress faster.

Want a place to start practicing? Then either click on Basics, Composition or Exposure in the blog tags below to see all posts on Ready, Aim, Click that pertain to those subjects.

Then get practicing.

Labels: , ,

Monday, April 13, 2009

Photographing water on the move

Take your shots of creeks, waterfalls and surf to a higher level by slowing down your exposure time. Digicamhelp, a web site for digital photography beginners (and beyond) is featuring an article I wrote that gives tips on how to get that misty, dreamy quality in your water shots. Check it out.

Labels: ,

Tuesday, February 17, 2009

Adding a vignette to photographs

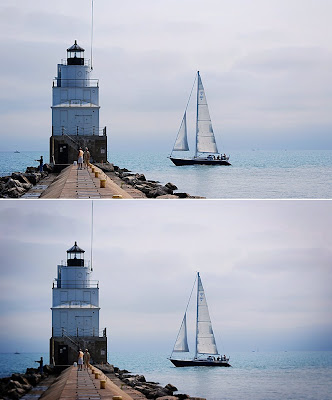
Digital cameras have greatly advanced even an amateur photographer's ability to capture sharply focused images - sometimes too sharply focused. Back in the days when film photography was the only game in town, there were a lot of camera lenses that couldn't focus across the entire area of the film, leaving photos dark and a bit blurry at the edges and corners. Sometimes a lot dark and blurry.

For those times when you want to subtly age your photos or even emphasize a certain part of the picture, you can simply add a vignette via a photo editing program like Adobe Photoshop Elements, which retails for around $80.

To create a vignette, use the Elliptical Marquee Tool to select nearly the entire photo. Feather the selection (240 pixels on a 10 megapixel image works well, use less feathering for smaller images), then invert the selection. Go to Enhance/Adjust Lighting/Levels and slide the right Output Level slider to the left, which will darken the edges of the photo slightly. You can then add some soft blur (Filter/Blur/Gaussian Blur) to your liking.

Photos © 2009 James Jordan.

Labels: ,