Monday, August 24, 2009

At the zoo

A zoo is not the ideal place for animal photography. Of course, given the cost of a safari to Africa, they're the next best alternative for me.

Most zoos are designed for the living space of the creatures (at least the newer or recently refurbished ones are). The best ones integrate an "up close and personal" viewing experience. But even those don't seem to take into account the needs of photography. Glass with all manner of glare and reflections, wire mesh barriers, and living areas that, while they provide lots of room for the inhabitants, also increase the distance from the camera, making life challenging for a photographer.Here are some tips on how I do things at the zoo.

Zoom, baby. At a minimum, I have a 200mm lens on at all times. I also use a 2x teleconverter to double the zoom. The tradeoff -- an exposure that's slow as molasses. The teleconverter takes away a stop of light from an already sluggish lens. This lion was shot at ISO 800 at an exposure of 1/1250 at a "wide open" effective f-stop of f8. This was OK for animals in the early morning sunlight. Animals in the shadows, not so much. The benefits -- you can get some great "in your face" shots that help disguise the fact that you were shooting in an artificial environment. You also can shoot right through mesh barriers without them registering in your shot. This lion was shot through a series of thin vertical wires separating people from big cats at a viewing station. Just be sure you're shooting through an area of mesh that is not in direct sunlight. You also have a better chance of avoiding reflections when shooting through glass when you use a long lens.

Patience is a virtue. Zoo animals have all the time in the world. You necessarily don't. But spend some time watching the critters. You might pick up a pattern of movement that you can use to your advantage. I watched a pair of lions pacing and positioned myself to catch them as they made their turns. I caught the young male above as he turned his head in advance of his body, making him apear as if he might be roaring or at least belting out his favorite song.

I also observe the rule of shooting early or late in the day. If I have to be there in the middle of the day, I'll try to catch animals in shady areas to avoid harsh shadows and the bluish light of the midday sun. I'll also change my white balance to "flash" or "cloudy" to warm up the tones in my shots.

Got your own zoo tips? Successes? Failures? Let me know.

Labels: ,

Tuesday, April 14, 2009

A few minutes with ...

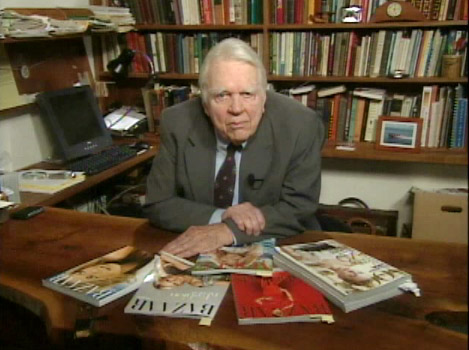
I’m going to go all Andy Rooney on you here for a minute and talk about something that bugs me regarding the photo advice I see on the interwebs. People who really should know better use the phrase, “Practice, practice, practice.” I find the phrase wrong, wrong, wrong.

Why? Because the phrase doesn’t tell you what or how to practice. If all you know is how to take pictures that are poorly composed, badly exposed (and that should be disposed), then practicing only cements your bad habits into place, and compounds your frustration. Been there, done that.

Try this instead. Work on just one thing at a time, then practice the heck out of it. For instance, early on in my photography I made up my mind that I was going to master exposure. But not just any exposure, I wanted to own exposure of early morning landscape shots. So I got up early. A lot. I went out and took photos of sunrises and the stuff the sunrise shone on until I could get a good exposure with good details in the highlights and shadows nearly every time (this was in the days of film, so it was a long process. Digital photography allows instant feedback so you can adjust in real time, not days and weeks, as I had to endure).

Then I moved to late afternoon/evening shots and practiced the heck out of those. Then nighttime shots. Then indoor shots. Get the idea? Get good at one thing, then add to it as you go. It makes practice meaningful and you see incremental progress faster.

Want a place to start practicing? Then either click on Basics, Composition or Exposure in the blog tags below to see all posts on Ready, Aim, Click that pertain to those subjects.

Then get practicing.

Labels: , ,

Thursday, December 4, 2008

Embracing the 'burbs

I recently read a post on an online photography forum where the poster bemoaned the fact that she lives in a suburban area and therefore, her opportunities for nature shots was drastically limited. I live in a suburban area myself and can understand her frustration to a point. I’ve struggled to maintain my love for nature photos while surrounded by houses and trees that obscure 60% of the sky or more.

But you know what? Nature is everywhere. If you can’t find it, you’re not looking hard enough. If you’re suburb-bound, here are some idea starters to try:

Start in your own backyard. Got plants, trees, flowers and critters? Good. Shoot ‘em. Isolate them from the suburban-ness around them by getting in close, blurring the background by narrowing your depth of field or contriving a background. Shoot upward, as in the example to the right. Shoot downward.

Got parks? Great. Explore them. Only got one or two? Get out to them in different seasons, different times of the day, different types of weather. I return to the same parks in my area on a regular basis.

Make the suburban-ness work for you. Show nature and suburb together. In harmony. Or at odds. Look for drama. Look for tranquility. Look for different moods.

I’ve published about 2,000 photos online on my photo blog and at Flickr and I would guess that as many as 80 percent of my photos were taken in suburban Chicago. Yes, I love vast unspoiled vistas and exotic locales, but the reality is that I am where I am and to pursue my hobby of photography, I must make the best of the situation.

Labels: ,

Tuesday, October 28, 2008

Everything that I know about photography I learned from post cards

OK, maybe not, but racks full of postcards draw me like a magnet when I'm out traveling. When my wife notices that I'm no longer walking with her through a store, she knows the first place to look for me. Postcards are a good reference source to see how different photographers approach subjects that have been photographed a million times already.

So, here are some of the things I've learned from postcards about photographing landmarks:

1. Photograph at a time of day when the fewest people are likely to photograph. This is usually around sunrise. Your photo will have a look that relatively few other photos will have.

2. Show the landmark in its surroundings.

3. Isolate the landmark from its surroundings.

4. Photograph the landmark at a time of year when relatively few other people will photograph it. Early spring, peak color in autumn and mid-winter are good choices.

5. If the sky is doing something dramatic ... bonus!

6. Stick to the rules of composition. Or not.

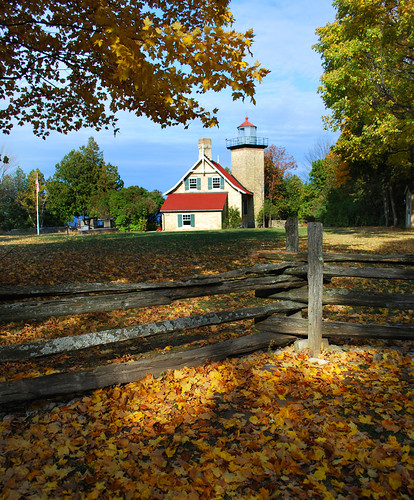
The above photograph of the Eagle Bluff Lighthouse in Door County, Wisconsin is a bit too typical of a "postcard" shot, but it was begging to be taken. Mid-morning on a fall day when the colors had reached their peak. Sun illuminating the lighthouse through a clearing in the surrounding trees. Blue sky creating a contrast of color to the gold and orange leaves. A spot of sunlight hitting the juncture of the split rail fence. I was there with a camera. What else could I do?

Photograph © 2008 James Jordan.

Labels: , ,

Wednesday, June 6, 2007

Be there

Woody Allen once said that “80 percent of being a success is just showing up.” I’m finding that to be the case with my photography. For some crazy reason, I don’t get any good shots when I’m sitting at home with my camera packed in its case. But the odds increase dramatically when I’m out and about with a camera in my hands.

Want to take better pictures? Take pictures. Lots of them. And to stack the deck even more in your favor, follow these hints:

Shoot within a half hour either side of sunrise or sunset. The light is low, warm and soft. Pro photographers don’t call these times the “magic hours” for nothing.

Look for drama. Creatures (human or otherwise) interacting with each other or their environment. Stormy weather. Moving water.

Can’t find drama? Create it. Change your point of view. Shoot from ground level. Find a high place. Tilt the camera. Overexpose. Underexpose. Get closer to your subject. Move farther away.

Compose yourself. Well, actually, compose your pictures. Rule of thirds is a good place to start. I personally try to place my subjects in the vicinity of either of the diagonal lines than run from the top left to lower right corners of the frame and vice versa. But don’t forget to try to go symmetrical every so often. Mix it up.

Build depth. Use diagonal lines in your photos to draw in your viewers. Try to establish three zones – foreground, middle ground and background.

Look for contrasts. Big and small. Near and far. High and low. Colorful and drab.

Then try to do as many of these in one shot as possible.

After you’re done shooting, evaluate what you’ve shot. What worked? What didn’t work? What would you have done differently?

Then go out and “be there” again.

Let me know how it goes.

Photographs © James Jordan.

Labels: ,

Sunday, January 7, 2007

Rule of thumb: Red rule

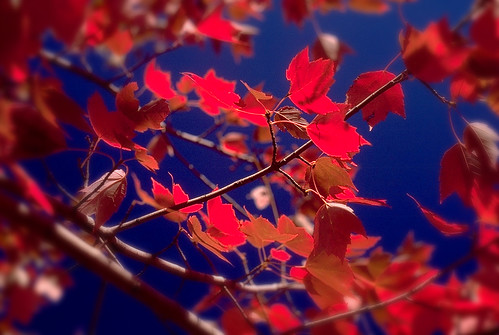
I learned the Red Rule from a newspaper photographer. He simply told me, "If you see red, shoot it!" Since then, I've taken note of all the red that shows up in photos that appear in newspapers and news magazines. There's even a group at Flickr dedicated to following the Red Rule, to which I've submitted a few scarlet scatterings of my own.

Red commands attention. These photos show a frame full of red and just a spot of red in a scene, and that both can be effective in drawing attention. So get out there and shoot some pictures that will have your viewers seeing red.

Photographs © 2007 James Jordan. Click on pictures to enlarge.

Labels: ,

Friday, January 5, 2007

Seeing the way a camera sees, Part 2

The camera sees less than half of what you can see

Where the camera has the human eye beat as far as the detail it can “notice,” the human eye humiliates the camera when it comes to the amount of light it can detect.

If the human eye were a camera, it would be able to adjust from an ISO range of 1 to 800. That gives us the ability to distinguish about 10,000 levels of light from total black to total white (about 10 and a half stops). The camera (or rather, film or a digital sensor) can at best record about 5 stops of light at any given ISO rating.

So, on average, your camera will not even be able to record half of the tonal range of what you see in a given scene. This will explain why what you could clearly see in the shadows of a brightly lit scene come out as a totally black blob in your photo. Or why those details in the snow are lost in a glare of white on your computer screen or print.

To give yourself an idea what your camera will record in a given scene, squint your eyes until they are a little less than halfway open. If you don't like what you see, you probably won't like a photograph taken of it either.

The best way to help the camera out is to avoid as much as possible taking pictures in very contrasty lighting, such as that found at midday. The light found a half-hour either side of sunrise and sunset (referred to by photographers as the “golden hours”) is less intense and more ideally suited to the limitations of the camera.

If you find yourself having to shoot in bright, contrasty light, the use of a flash unit to “fill in” shadow areas can improve your results.

Labels:

Wednesday, January 3, 2007

Seeing the way a camera sees, Part 1:

For better or (usually) worse, it sees everything

How many times have you stumbled across what seemed to be a picture-perfect scene, raised your camera and clicked away, only to be disappointed in the results? Where did those huge black areas come from? Why are the highlights blown out, and how did that lovely grove of trees become a big jangle of haphazard branches? Why are the faces so dark? They looked just fine in the viewfinder!

The simple explanation is that the camera does not “see” a scene the same way the human eye does. It captures the scene on its own terms, not necessarily yours. Once you learn the limitations of the camera, you can begin to use those characteristics to your advantage, and you’ll find yourself becoming victimized less and less.

Cameras differ from human vision in two main ways (there are others, but for the beginner, overcoming these two will keep one plenty busy). The first way is that the camera sees absolutely everything that is placed before it, where humans have a tendency toward selective vision – seeing what we want to see and disregarding the rest. You see your lovely children posed on the beach. The camera sees the distant post growing out of your child’s head, the tangle of kelp in the corner of the picture and the seagull flying at the odd angle in the background as if to attack your subject.

When setting up your shot, purposely take a few seconds to scan the entire frame and force yourself to look for potential distractions, then remove them or reposition yourself to eliminate them. The handler of the great horned owl at the right was quite patient as I spent a couple of minutes shifting myself around in an effort to eliminate as many distracting background elements as I could. I moved in closer, zoomed in with my lens and used aperture priority with a low f-stop to throw the background out of focus – three things you can do to help defeat the camera’s tendency to be brutally honest. (And by the way, when shooting closeups of people or animals, try to focus on the eyes.)

Photograph © 2006 James Jordan. Click on picture to enlarge.

Labels: