At the zoo
A zoo is not the ideal place for animal photography. Of course, given the cost of a safari to Africa, they're the next best alternative for me.Labels: Basics, Shot planning
Take better pictures, no matter what type of camera you own
A zoo is not the ideal place for animal photography. Of course, given the cost of a safari to Africa, they're the next best alternative for me.Labels: Basics, Shot planning
The Fourth of July means fireworks here in the U.S. Fireworks means a chance to pack up the family for some visual and audio stimulation. Fireworks also provides an opportunity to capture some truly stunning photographs.
Labels: Night photography, Shot planning
Take your shots of creeks, waterfalls and surf to a higher level by slowing down your exposure time. Digicamhelp, a web site for digital photography beginners (and beyond) is featuring an article I wrote that gives tips on how to get that misty, dreamy quality in your water shots. Check it out.Labels: Exposure, Shot planning
Labels: Post-processing, Shot planning
aned the fact that she lives in a suburban area and therefore, her opportunities for nature shots was drastically limited. I live in a suburban area myself and can understand her frustration to a point. I’ve struggled to maintain my love for nature photos while surrounded by houses and trees that obscure 60% of the sky or more.
Got plants, trees, flowers and critters? Good. Shoot ‘em. Isolate them from the suburban-ness around them by getting in close, blurring the background by narrowing your depth of field or contriving a background. Shoot upward, as in the example to the right. Shoot downward.
em in different seasons, different times of the day, different types of weather. I return to the same parks in my area on a regular basis.Labels: Basics, Shot planning
The natural inclination is to shoot a closeup of an object from, well ... close up. For this shot, I stepped back several yards and used a telephoto lens to bring the object to me. This changes the viewing perspective ever so slightly and can result in a shot that is a bit different than what we may be used to seeing and may compel a viewer to stick with it a bit longer than they would have otherwise. It may not work every time, but it's worth playing with as you're out shooting.Labels: Composition, Shot planning
attention of your viewer.Labels: Composition, Shot planning
Labels: Composition, Shot planning
There are two sides to photographic simplicity. There’s the simplicity (or lack of it) in the final image that’s created. Then there’s the simplicity of thought that goes on behind the lens as the picture is being created. I believe the two are related. I’ve studied some complex photographic theories and tried to boil them down to a few simple basics that I regularly use in making pictures, and those are the things I share here at Ready, Aim, Click.
So here’s a simplification of some complex theories of composition. I’ll admit that this is brand new thinking on my part, and I have not had a chance to fully field test it, but count on it that I will.
The rules of composition are based on the golden mean, a classic school of thought based on mathematically-based subdivisions of space that create visually appealing patterns and designs. That’s the complex part. Here’s my simplification: If you draw a diagonal line from any corner of a photograph to its opposite corner, placing your main subject anywhere on that diagonal line will result in a pleasing composition. This assumes that your background is fairly simple and that it’s quite obvious what your subject is.
The large photo at the top has our subject floating on a diagonal line from the top left to bottom right of the frame. The smaller photos are crops that place our subject on various spots on the diagonal lines. The third introduces additional subjects on the opposing diagonal, which opens up other possibilities. Each change in placement creates subtle shifts in meaning for each photo; try framing up several possibilities the next time you're shooting, then decide which one works best for you.
Like I said, I plan to play with this idea and will post some results here in the near future. And I’m not declaring the rule of thirds null and void.
Yet.
Photos © 2007 James Jordan. Click on pictures to enlarge.
Labels: Composition, Shot planning
After I had reviewed one of Roger’s photos and fixed it in a prior post here, he mentioned that he imagined that it would be possible to get some interesting photos by shooting into the sun and not sticking to the maxim of shooting with the sun over one’s shoulder all the time. The answer is a qualified yes. You can get some very interesting photos while shooting into the sun, but you have to keep several things in mind when you do so:
Shooting into the sun will mess up your automatic exposure big time, and you must compensate. Don’t shoot into the sun unless you have an extremely interesting shape to silhouette against the sky. If you want any detail at all in the object against the sun, you either need a flash or a special filter.
Compensating your exposure When the sun is going to be a major part of one of my photos, I’ll take a meter reading of the sky above the sun with the sun just out of the frame. This generally gives an accurate portrayal of the sky and will create a solid silhouette of whatever else is in the frame. The exception is when shooting flowers and foliage, which are translucent and glow beautifully when backlit. (Top photo) Any time you are using the sun to backlight a photo, whether it's in the photo or not, an exposure value (EV) of +2 is called for.
Interesting silhouette If you're going for a silhouette, it has to be very recognizable and interesting. It needs to be just as obvious to the viewer of your photo as it was to you. Keep it as simple as
possible. (Second photo) Try positioning your subject directly over the orb of the sun for interesting effects (Top and bottom photos).
Want detail? If you’re close enough to the silhouetted object to use your flash, do so. But remember, too much flash will give your photo a “faked” look and too little flash will leave your subject in the dark. Improve your odds by using the portrait setting of your digital camera if it has one. Bracket your shots (shoot a picture each at one f-stop above and below your metered setting) if you are using a manual flash. (Third photo) You can also use a sheet of white poster board or foam board to reflect light back onto the subject.
If your subject is too far for flash, another option is the use of a graduated neutral density filter, if your camera is able to accept filters. A grad ND filter is dark on about a third of the filter’s surface and gradually fades to clear at about the halfway point. Positioning the dark side of the filter over the sky allows you to open your f-stop by up to four stops (depending on the strength of the filter) to give more exposure to objects on the ground. (Second and bottom photos were shot using graduated neutral density filters)
Most of all, experiment and have fun.
Click on pictures to enlarge. Photographs © 2007 James Jordan.
Labels: Exposure, Shot planning
Stick with optical zoom. Optical zoom records everything that can be captured by the lens itself. Once you go beyond the optical range into digital zoom, the camera begins to split pixels in an effort to digitally enlarge the largest image afforded by the lens. The farther you go into the digital zoom range, the lower the quality of the image.
If you’re trying to capture a picture of Bigfoot, the Loch Ness monster, a flying saucer or Elvis, I can perhaps see a use for digital zoom. Otherwise, stick to digital zoom.
You'll thank me later. That is, unless you run into Bigfoot, the Loch Ness monster, a flying saucer or Elvis.
Labels: Rules of thumb, Shot planning
photos go (this particular lighthouse is way off the beaten path, so you have you take what you get, conditions-wise). My family has come to the understanding that when we’re traveling, dad is going to be out early in the morning and late in the afternoon into early evening taking pictures. The rest of the day is for accompanying the family to shopping or other activities. But back to the picture at hand. My friend knows enough about composition to put the main subject, the lighthouse, in one of the outer third corners of the picture, but he still came away with the
feeling that something may be off. To me, the biggest problem is that the lighthouse seems to be lost in the trees. While my friend established a foreground, middle ground and background in his picture, the trees in the middle ground, through the visual magic of perspective, seem to be as tall as the lighthouse and compete for attention with the tower. So the first order of business is to explore some cropping options to try to isolate the tower and minimize the distraction of the trees.
I explored both a horizontal and vertical crop. I focused on getting the large tree at the left of the picture just out of the frame, keeping as much of the horizon of the lake as possible and minimizing the tall thin pine tree to the right of the tower. I then moved the vertical crop up and
down to see if I liked it better with more sky or more foreground foliage. Personally, I prefer the crop with the foliage on the dune, but you can go either way.
A little darkening of the middle tones and a slight boost in color saturation in PhotoShop rounded out my adjustments of the picture. The lighthouse now stands as the undisputed focal point of the photo. By the way, my friend has more photos and some thought-provoking posts at his blog. Check it out.
Do you have a picture you would like critiqued or fixed? Send me an email at jjrdns6[at]aol[dot]com and write "Troubleshooting" in the subject line.
Click on pictures to enlarge.
Labels: Composition, Shot planning, Troubleshooting
The results are rather flat-looking pictures.Labels: Composition, Shot planning
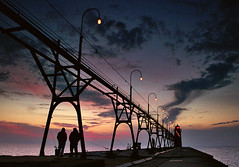
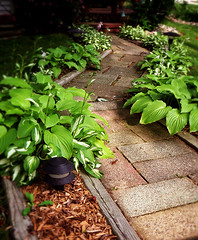
atwalk give the impression of depth (a bonus is the two fishermen framed in the support of the catwalk – a third fisherman is framed further down the pier). In the second photo, the alternating diagonals of the winding walkway emphasize depth.Labels: Composition, Shot planning
When traveling, I’ll usually take one of the above-mentioned shots just to make those who insist on that type of thing happy. Then I’ll go to work creating an environmental portrait of each person who came along. We didn’t come to the place to stand in front of it; we came to see it, to experience it, to interact with it. So that’s the way I want to depict us. I will take candid or loosely posed pictures of people interacting with the environment, not standing stock-still in front of it.
I’ll take photos that show more environment than person, then switch to show more person than environment, leaving just enough clues as to where we were. I also follow some of the other tips I've mentioned on this blog (change your altitude, get out of the center, etc.). What I’ll wind up with is a good variety of interesting shots that then become excellent fodder for scrapbooking (for my wife), or in my case, photo blogging.
These are some photos of the ladies in my life (wife and daughters) along the Lake Michigan shoreline in northern
Photographs © 2007 James Jordan. Click on pictures to enlarge.
Labels: Composition, Shot planning